Start your Python Django app on cPanel

We have created this tutorial as a simple start for setting up your Python Django app on your Internetivo cPanel account.
-> The supported flavour of Python Django app is based on VirtualEnv - WSGI
Step 0:
Login to your cPanel account (we've chose internetivo.com as a domain example)
Step1:
Scroll down at your cPanel accout and select "Setup Python App" as shown in the figure below.
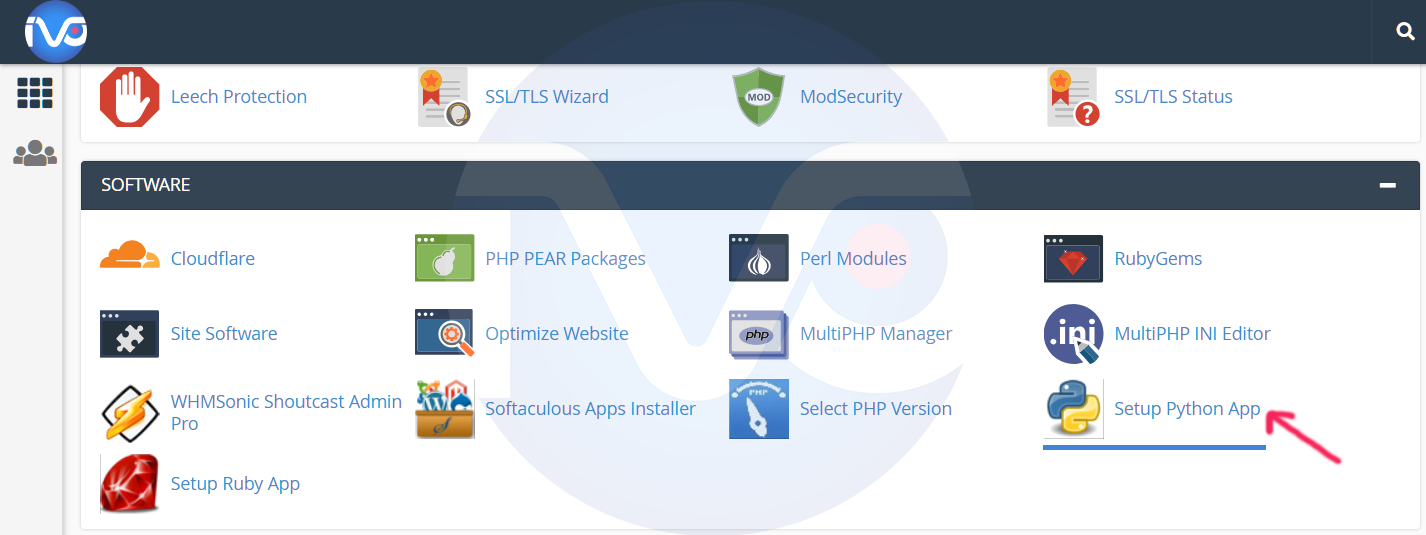
Figure 1: Internetivo.com cPanel - Software - Setup Python App
Step 2:
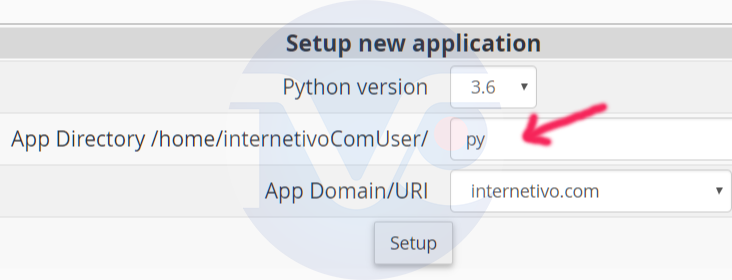
i) Select Python version (we've chose the latest version - 3.6 for this tutorial)
ii) Type the directory you would like to setup the Python app (we've typed "py", so, that means the Python app URL for us, will be -> https://internetivo.com/py/)
Step 2:
i) Select Python version (we've chose the latest version - 3.6 for this tutorial)
ii) Type the directory you would like to setup the Python app (we've typed "py", so, that means the Python app URL for us, will be -> https://internetivo.com/py/)
Figure 2: Internetivo.com cPanel - Software - Setup Python App - Setup new application
Step 3:
Once you click "Setup", the Python app will be installed at your directory and a new instance will be displayed "Existing applications (1)"
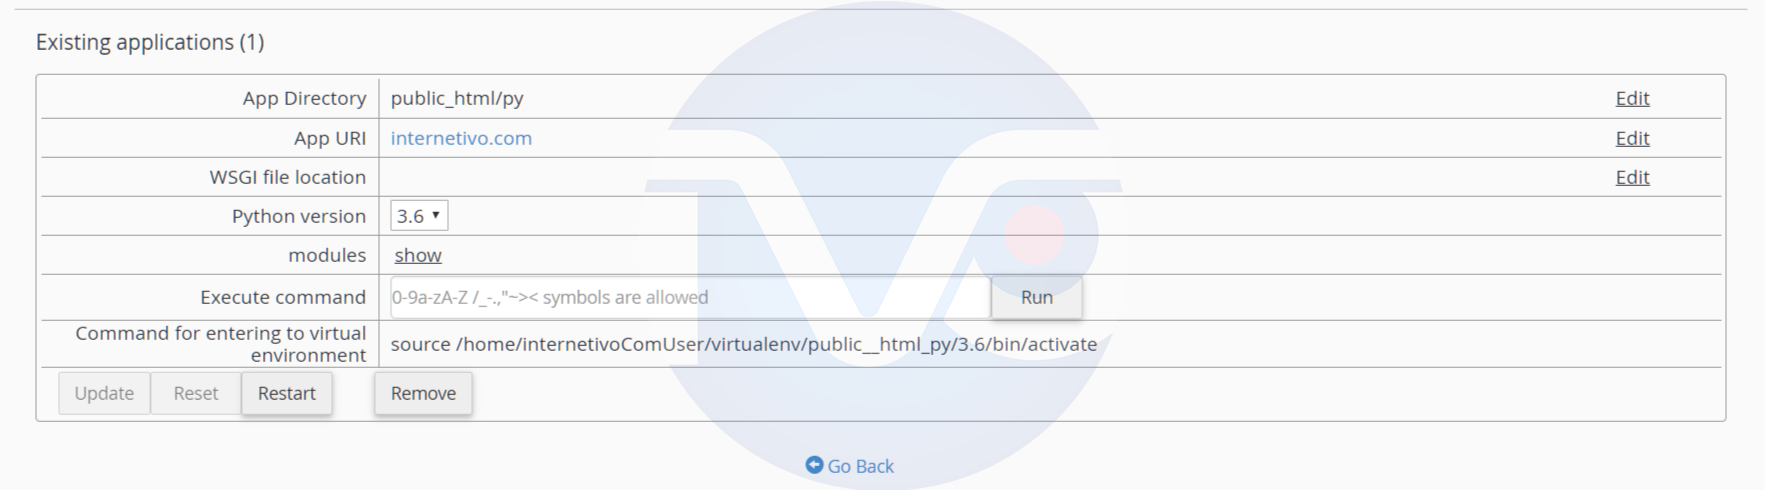
Figure 3: Internetivo.com cPanel - Software - Setup Python App - Setup new application - Existing applications (1)
Step 4:
When you click at "show" button (next to 'modules'), you could type a module you would like to Add, like "Django"

Figure 4: Internetivo.com cPanel - Software - Setup Python App - Setup new application - Existing applications (1) - Add modules
Step 5:
Now go back to 'File Manager' at your cPanel account
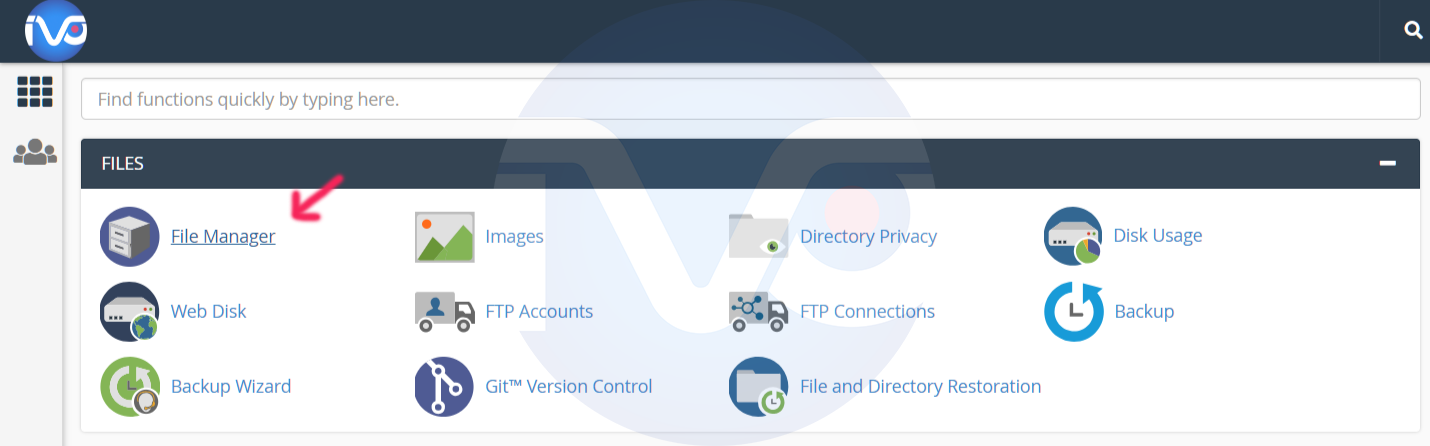
Figure 5: Internetivo.com cPanel
Step 6:
At 'File Manager', double-click (open) the directory 'public_html' (that's your stored public files which are displayed when someone visits your website - 'https://internetivo.com/' will display the files that are in the server directory: '/home/internetivoComUser/public_html/')
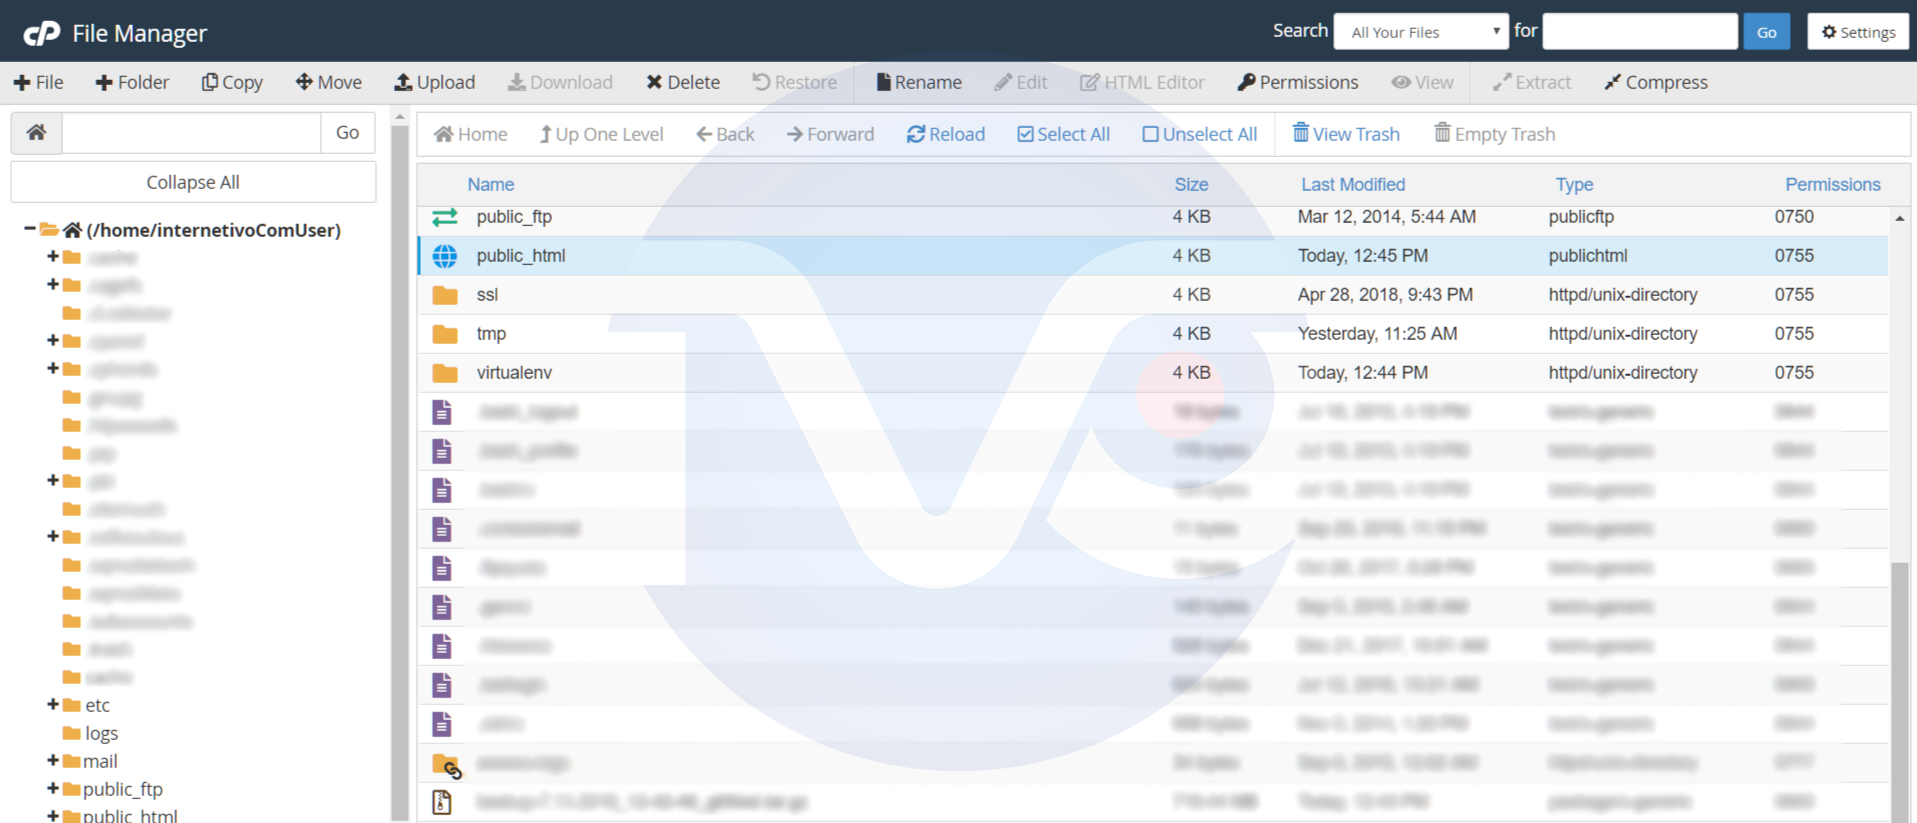
Figure 6: Internetivo.com cPanel - File Manager
Step 7:
Double-click (open) the directory 'py' which is the directory we have configured previously (full directory: '/home/internetivoComUser/public_html/py')

Figure 7: Internetivo.com cPanel - File Manager - 'public_html/py/'
Step 8:
Double-click (open) the file 'passenger_wsgi.py'

Figure 8: Internetivo.com cPanel - File Manager - 'public_html/py/passenger_wsgi.py'
Step 9:
This code is displaying 'It works!' and in the next line 'Python (and it's version here)'
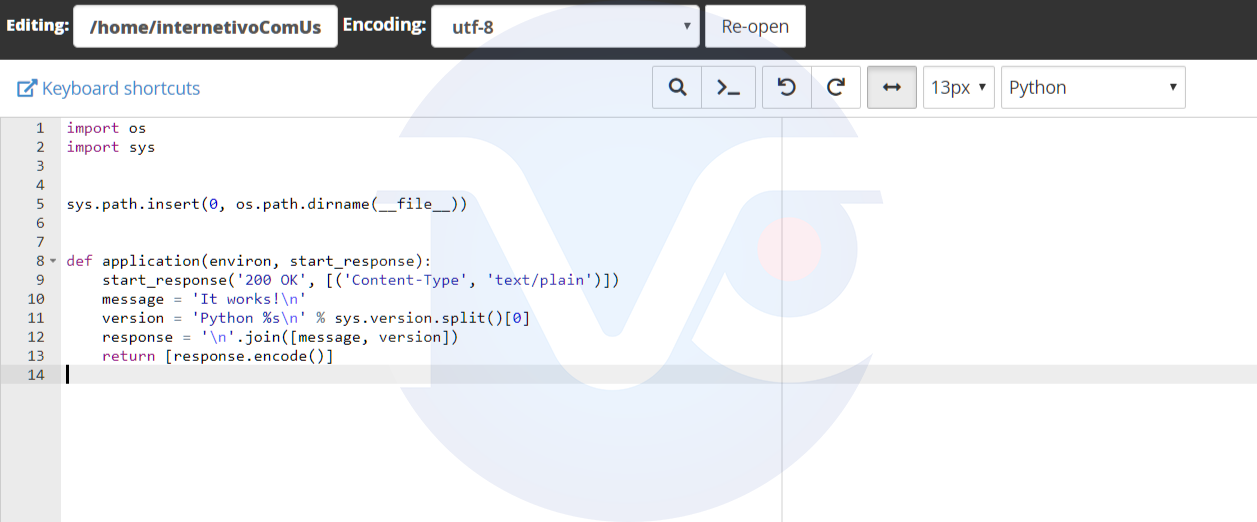
Figure 9: Internetivo.com cPanel - File Manager - 'public_html/py/passenger_wsgi.py' - file contents
Step 10:
Example of what it could be displayed according to your Python version (we've installed Python app with version 3.6)
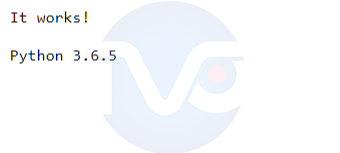
Figure 10: Sample text when you visit your Python app URL (for example: https://internetivo.com/py)
Step 11:
We've added ' Internetivo' to the 'message' text in order to test the code. Click 'Save' for saving your changes.
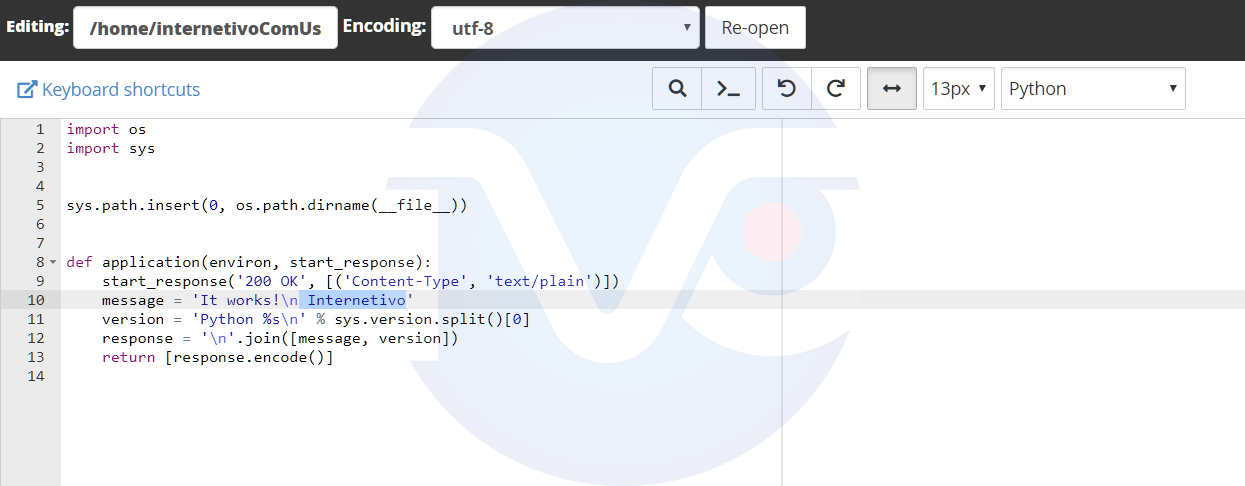
Figure 11: Internetivo.com cPanel - File Manager - 'public_html/py/passenger_wsgi.py' - file contents - adding ' Internetivo'
Step 12:
If you check now the Python app URL, it might now displayed the updated message. You should go back to 'Setup Python app' and click 'Restart' for updating the message.
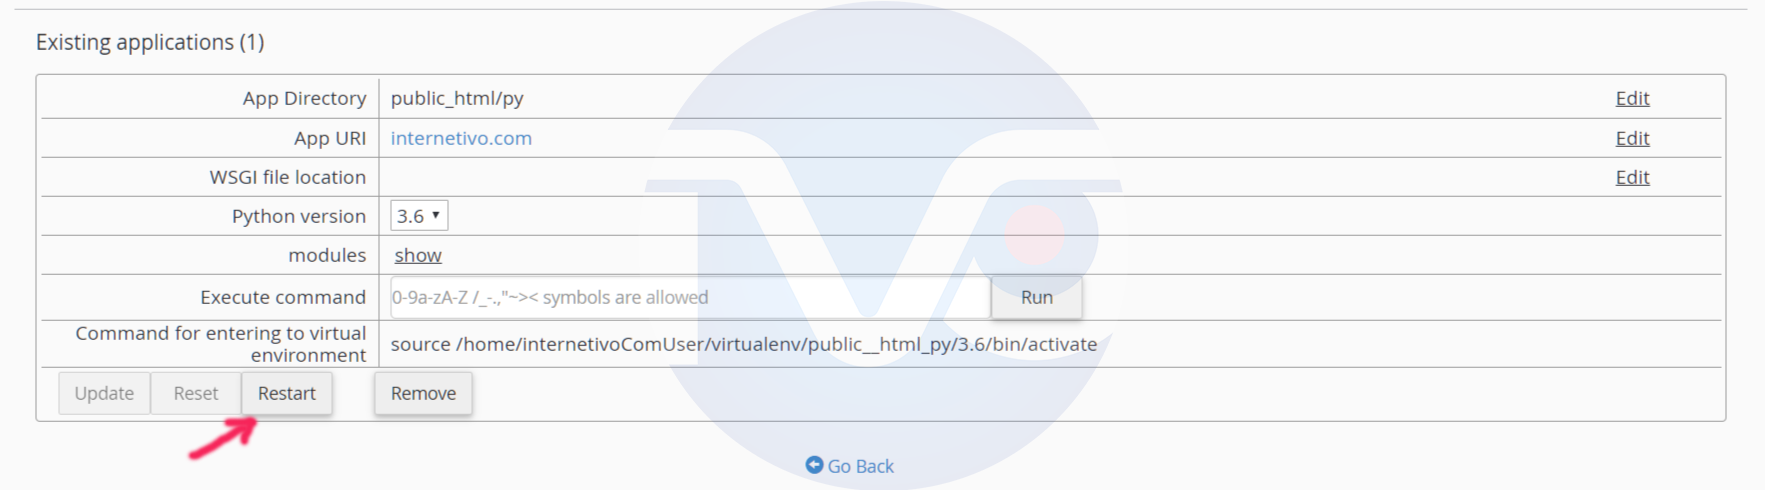
Figure 12: Internetivo.com cPanel - Software - Setup Python App - Setup new application - Existing applications (1) - click 'Restart'
Step 13:
This code is displaying 'It works!', in the next line 'Internetivo' and in the next line 'Python (and it's version here)'
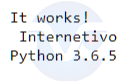
Figure 13: Sample text when you restart your Python app and visit the URL again (for example: https://internetivo.com/py)
- Well done !
- Feel free to check more tutorials by clicking >> here <<
@Credits: Internetivo
@Service(s): Internetivo - Business Solutions - Software Development
Step 3:
Once you click "Setup", the Python app will be installed at your directory and a new instance will be displayed "Existing applications (1)"
Figure 3: Internetivo.com cPanel - Software - Setup Python App - Setup new application - Existing applications (1)
Step 4:
When you click at "show" button (next to 'modules'), you could type a module you would like to Add, like "Django"
Figure 4: Internetivo.com cPanel - Software - Setup Python App - Setup new application - Existing applications (1) - Add modules
Step 5:
Now go back to 'File Manager' at your cPanel account
Figure 5: Internetivo.com cPanel
Step 6:
At 'File Manager', double-click (open) the directory 'public_html' (that's your stored public files which are displayed when someone visits your website - 'https://internetivo.com/' will display the files that are in the server directory: '/home/internetivoComUser/public_html/')
Figure 6: Internetivo.com cPanel - File Manager
Step 7:
Double-click (open) the directory 'py' which is the directory we have configured previously (full directory: '/home/internetivoComUser/public_html/py')
Figure 7: Internetivo.com cPanel - File Manager - 'public_html/py/'
Step 8:
Double-click (open) the file 'passenger_wsgi.py'
Figure 8: Internetivo.com cPanel - File Manager - 'public_html/py/passenger_wsgi.py'
Step 9:
This code is displaying 'It works!' and in the next line 'Python (and it's version here)'
Figure 9: Internetivo.com cPanel - File Manager - 'public_html/py/passenger_wsgi.py' - file contents
Step 10:
Example of what it could be displayed according to your Python version (we've installed Python app with version 3.6)
Figure 10: Sample text when you visit your Python app URL (for example: https://internetivo.com/py)
Step 11:
We've added ' Internetivo' to the 'message' text in order to test the code. Click 'Save' for saving your changes.
Figure 11: Internetivo.com cPanel - File Manager - 'public_html/py/passenger_wsgi.py' - file contents - adding ' Internetivo'
Step 12:
If you check now the Python app URL, it might now displayed the updated message. You should go back to 'Setup Python app' and click 'Restart' for updating the message.
Figure 12: Internetivo.com cPanel - Software - Setup Python App - Setup new application - Existing applications (1) - click 'Restart'
Step 13:
This code is displaying 'It works!', in the next line 'Internetivo' and in the next line 'Python (and it's version here)'
Figure 13: Sample text when you restart your Python app and visit the URL again (for example: https://internetivo.com/py)
- Well done !
- Feel free to check more tutorials by clicking >> here <<
@Credits: Internetivo
@Service(s): Internetivo - Business Solutions - Software Development
